
I have a confession to make.
I’ve never spun from a batt before.
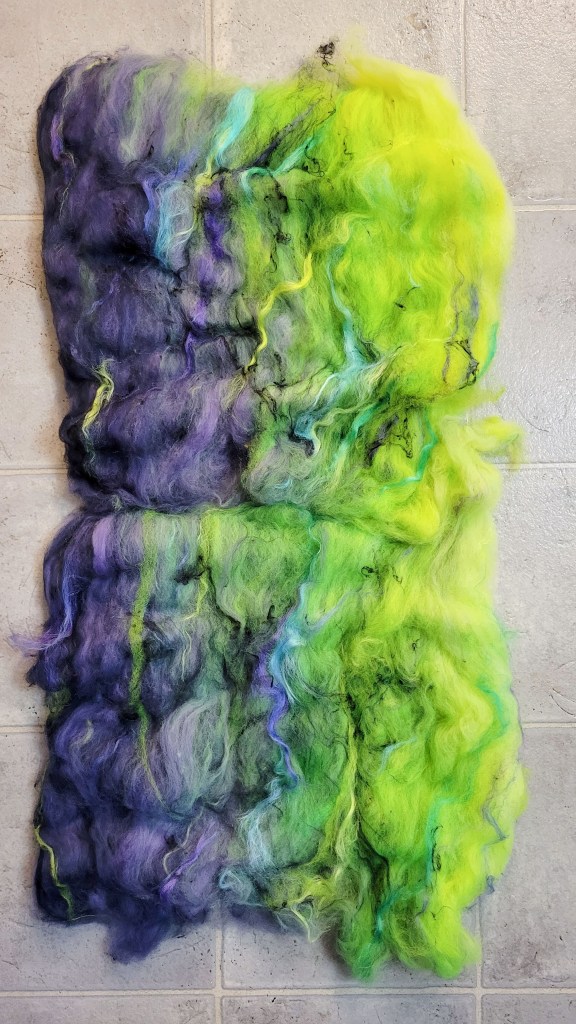
But I fell in love with these beautiful UV reactive batts from Fossil Fibers, and I knew they’d be perfect for my gratitude spin which starts in a few days. Have you been through her shop updates? Her fiber sells out so fast, I was very grateful to score not one but two of these delights.
And how much more awesome would it be to pair them with UV reactive spindles?


Well, not pink spindles though. They looked cool in these photos, but I’m hoping to find some spindles which coordinate even better.
In addition to new spindles, I also needed a solid plan for how to spin these beautiful batts. Batts are generally fluffier and more airy than combed top (my typical fiber choice), and these two in particular have a lot more texture than I’m used to spinning.
As with any spinning project, we (should) always start with the question, “What do you want your yarn to look like when it’s done?”
Since I have two batts, a two-ply yarn seems like an easy choice. Now, do I want a gradient that progresses in one direction (from light to dark or vice versa)…
…or do I want the colors to be reflected, or perhaps repeated, across the yarn?

Once that decision is made, then we have several options on how to proceed with the batt. Going with a straightforward gradient (the first photo), the easiest approach is to tear strips along the grain of the batt, and then spin them end-to-end.

The five strips in the above picture is just an example. You can pick as many strips as you want. For this batt, more strips will have a narrower color range in them, whereas wider strips will result in more colors blending as you spin each strip. You also have the flexibility to start each strip for either end, which provides more options for how to transition between the strips, as seen below.

It’s worth noting that each of these strips can be rolled into a fauxlag, adding more air and fluff into your yarn.
A popular variation is a “zigzag” method, where the strips don’t go all the way through the batt. By alternating which side of the batt you start from, you produce one long strip of fiber.
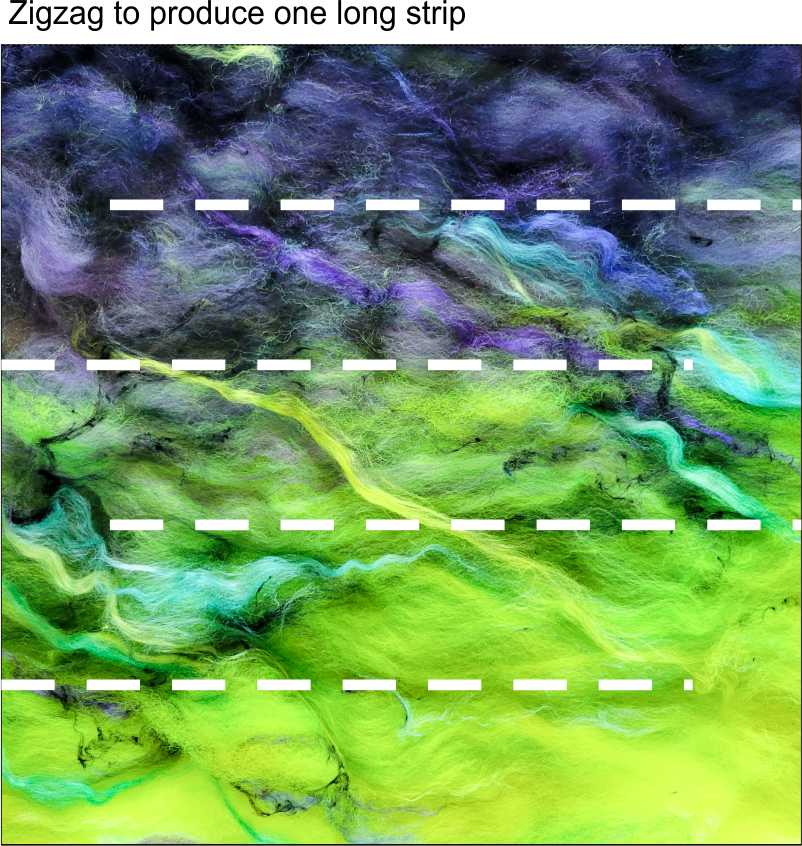
Because the whole batt is connected, you don’t need to worry about joins while spinning. Or in my case, deciding which end of the strip makes most sense to start from each and every time. On the other hand, this approach removes the option of using fauxlags for the additional air they introduce into the yarn.

If you want multiple color repeats, you could separate the batt into strips going across the grain, instead of with the grain. According to this blog post by Jillian Moreno, separating the batt across the grain will produce an even fluffier yarn because of how it mixes up the fibers and adds more air to the prep. In the following picture, I show three repeats.

Using three strips would allow you to have the gradient repeated three times within your yarn, rather than just once.

If you wanted to reflect the colors, an even number of cross-grain strips would probably work better. Each pair of strips would reflect the gradient from end to end.

In this particular batt, you could achieve very different effects if you started with the dark versus light end of the strip.

It’s also possible to switch it up even more by using a different strategy for each singles of the yarn. In the example above, one singles could be spun light to dark, while the other was spun dark to light. When plyed, the resulting yarn would be striped along its entire length, like a UV reactive barber pole.
You could also produce a “fractal” yarn. One singles could be spun with one long gradient color progression, and the second singles could be spun with color repeats.

There are other strategies for batt spinning that I haven’t included here because I didn’t consider them as options for this particular spin. For instance, I could start spinning at one corner of the batt and proceed diagonally across it, which would mix up the colors even more than the strategies described above. And of course, I could always just tear off random pieces of fiber and spin with no plan at all—which is probably what I would have done a few years ago!
So which of these many options did I choose? For this project, I have decided to keep it simple by using the zigzag approach for each batt, and then spinning and plying them in order to preserve the original gradient.
With that settled, now off to find some different spindles to use! Luckily, I know a guy.

Very interesting read! Like the zig zag idea!
LikeLike
[…] long last, here are the results from my first batt spinning. The entire yarn was spun and finished in the course of the gratitude spinalong that I hosted on […]
LikeLike
[…] However, the center pull ball solved my leftover singles problem, and not a single scrap of that precious batt went to […]
LikeLike