
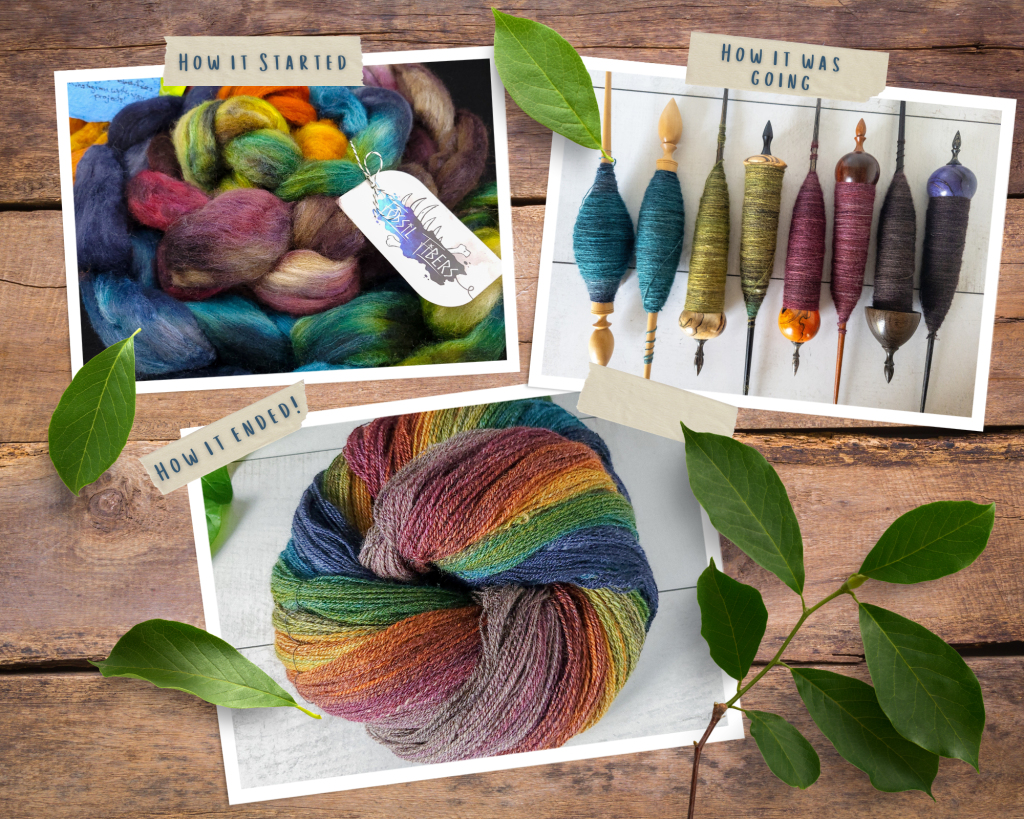
At long last, I present the second half of my Tour de Fleece Retrospective. In this post, I will focus on how I finished the two-ply yarn that I spun as singles during the 23 days of this year’s Tour de Fleece. (If you missed part 1, you can find it here.)
Step 1: Plycrastination
Of course, I continued admiring the singles for several additional days. Ostensibly this is called “letting the singles rest”, but it also allowed me to procrastinate on the actual plying process a little longer.
Step 2: Plying Ball
Just like predrafting yarn with a diz, a plying ball takes extra time but improves the finished product. Wrapping a plying ball allows you to align the singles—and deal with issues like adding a new spindle’s yarn into the mix when the previous spindle runs out—separately from managing how much twist is going into the singles to create the plyed yarn.
Using my Spanish Peacock plying stand and a binder clip, I wrapped both singles yarns together around a felted core. You could also use a wool dyer ball or tennis ball as a core. Starting with a core makes the ball a manageable size even at the beginning, before the singles have started adding bulk.
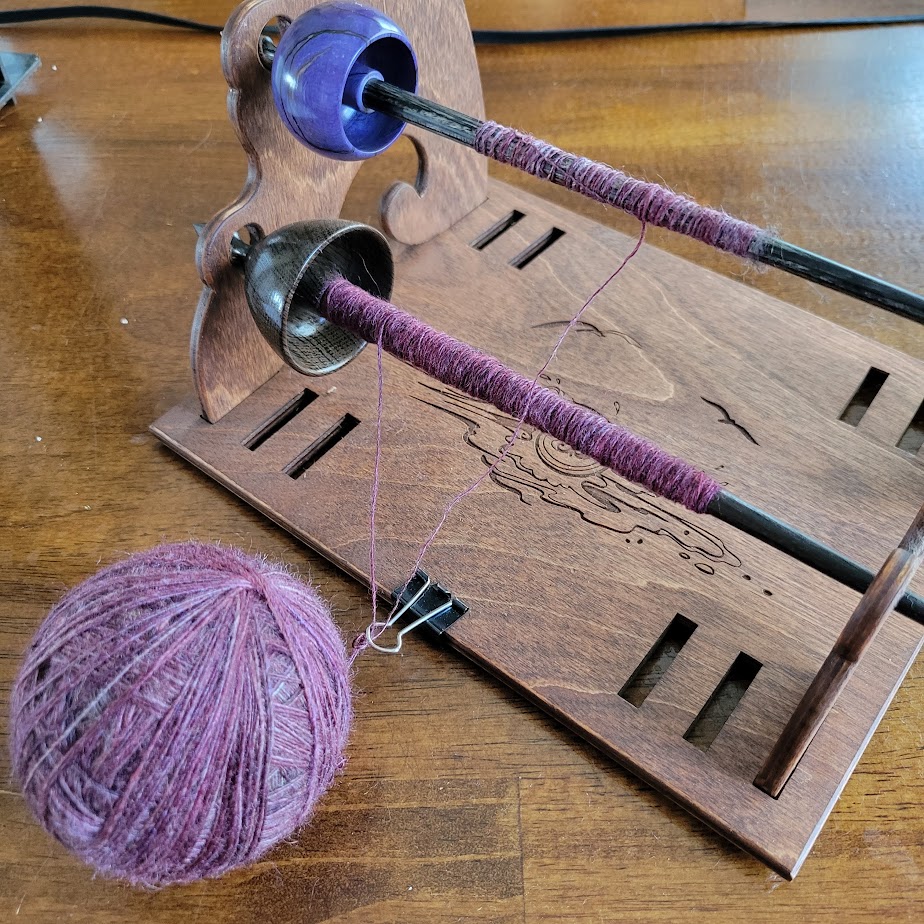
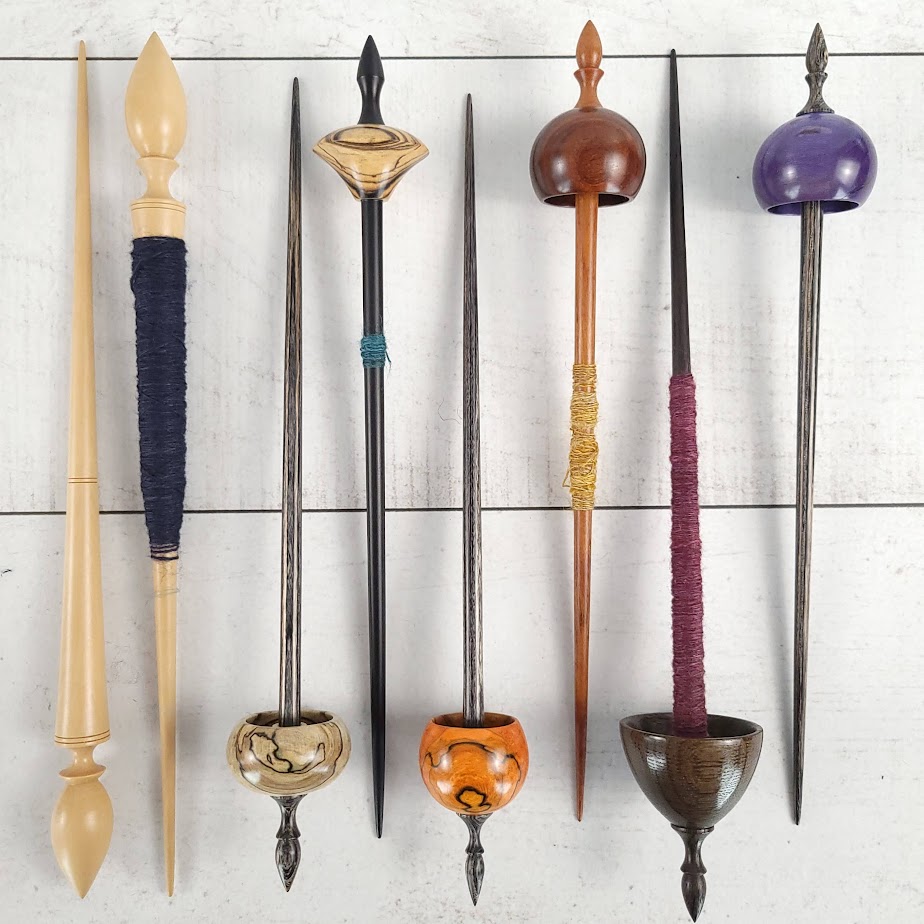
Despite my care weighing and measuring when planning this spin, not a single matched pair of singles ended up the same length. And there was no pattern to the mismatch either—not by first or second singles, nor type of spindle, nor how early or late I spun it during the Tour. In retrospect, this random variation would have balanced itself out over the length of the yarn. However, I chose to leave the excess on the spindle, rather than adding it to the plying ball, just in case it really added up and shifted the color progression too far at the end. After the next new spindle was added to the plying stand and its singles joined to the ball, I would break the old singles and remove the spindle with its extra yarn. (Note this editing process meant my final yarn was only 7.86 ounces, rather than the full eight I started with… but I still say eight ounces during this post for simplicity.)
Here is a final picture of the spindles with their leftover singles yarn.
Step 3: Adding Twist
This is the step most spinners would recognize as “plying”. Again, I separated “aligning the singles” and “putting twist into the yarn” into two separate steps to make each one easier for me to handle.
I used my Electric Eel Wheel 6, Evie, for this part of the process. I didn’t know if a single bobbin could hold eight ounces of yarn, but that was my hope. I hate joins while knitting, so I wanted to avoid splitting the yarn across two bobbins if at all possible.
One strategy I tried for this was cross-lacing the yarn across the arms of the eSpinner. This requires flipping one of the hooks over so it faces up, like the two on the other arm, rather than its typical downward orientation. Cross-lacing on a traditional wheel slows the yarn uptake to allow more time for twist to enter the fiber more evenly (or to compensate for fast peddling!), but it also makes the yarn wind on more smoothly and compactly than the regular approach.

The results speak for themselves! Even if I constantly stopped to move the hooks, I wouldn’t have been able to get a bobbin this neat and tightly packed without the cross-lacing!
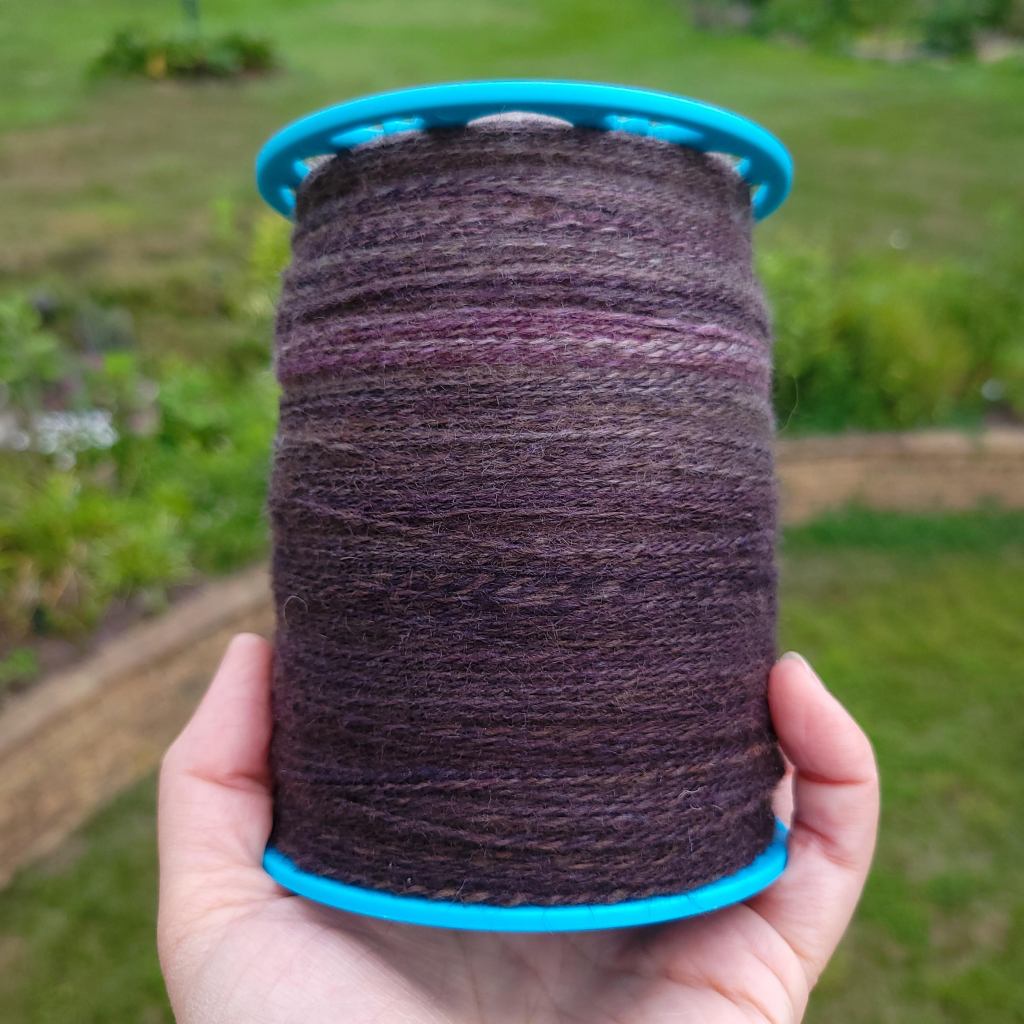
And I probably could have fit another ounce or two of yarn on there. I’ll know for next time.
Step 4: Skeining
Skeining might actually be my least favorite step of yarn finishing. Previously I would use a niddy-noddy to tediously wind the yarn off the eSpinner. My last skein winder/swift/whatever-you-want-to-call-it was an inexpensive model from an online store that could barely handle four ounces of yarn without the pegs bending inwards and the yarn slipping off as it built towards the top of the pegs. I thought it would work better than the niddy-noddy, and I was wrong.
Thankfully, Mike custom built me a heavy-duty tabletop swift with tall pegs that lock into place so tightly. While this custom swift held up to eight ounces of fiber much better, the pegs almost weren’t tall enough!

Note to self: ask Mike to craft a second set of extra large pegs!
Unfortunately, once the yarn was on the swift I could see several places where it was underplyed. Even though I was just adding twist, and not simultaneously aligning the singles, I still somehow ended up inconsistent. This gives me something to work on improving with the next spinning project.
Once the yarn was (barely) on the swift, I was able to tie chunks of the skein with strings so they wouldn’t tangle in the bath while setting the twist. I truss the skein once on each of the four sides of the skein-winder. I could also count the number of times the yarn wrapped around the pegs to estimate the yardage. Counting yardage, by the way, is the other reason skeining is my least favorite step. I always seem to lose count, no matter how carefully I try to keep track. On set of ties, I knot the string every 20 strands, so it should be easy. Just count by twenty, then multiple by the distance around the swift (72″) to estimate yardage. This math tells me this yarn measures about 950+ yards at approximately 20 wraps per inch (WPI).
Step 5: Setting the Twist
I don’t have any photos of this step, but it’s easy to describe. I filled a plastic tub with just enough warm—not hot!—water to cover the yarn, swished in a squirt of unscented Soak laundry detergent, and then submerged the yarn.
Generally speaking I allow the yarn to bathe for… Well, I’ve never actually measured how long it soaks. I usually tend to other chores and forget the yarn until somebody complains about the tub being in the way. At that point, I remove the yarn and allow it to dry. (No, I don’t rinse the yarn. I don’t use enough of the detergent to leave a soapy feel that needs to be rinsed out.) I used to add weights to the yarn while drying, because I had heard the additional tension helped set the twist. Then other spinners said the extra tension was not good for the yarn so I now skip the weights. I sometimes “snap” the yarn, by holding a length of it between my hands loosely and then pulling my hands apart hard till the yarn “snaps” and my hands bounce back. Supposedly this helps the fibers realign and evens out the twist. However, my shoulders hate snapping, so I only do it once per section of yarn.
Step 6: Admire
Wait, did you think the final step was picking a knitting project and turning the yarn into a gorgeous garment? That’s crazy talk! Instead, I attempted to artistically arranging the yarn in a pile and then took photos of it!
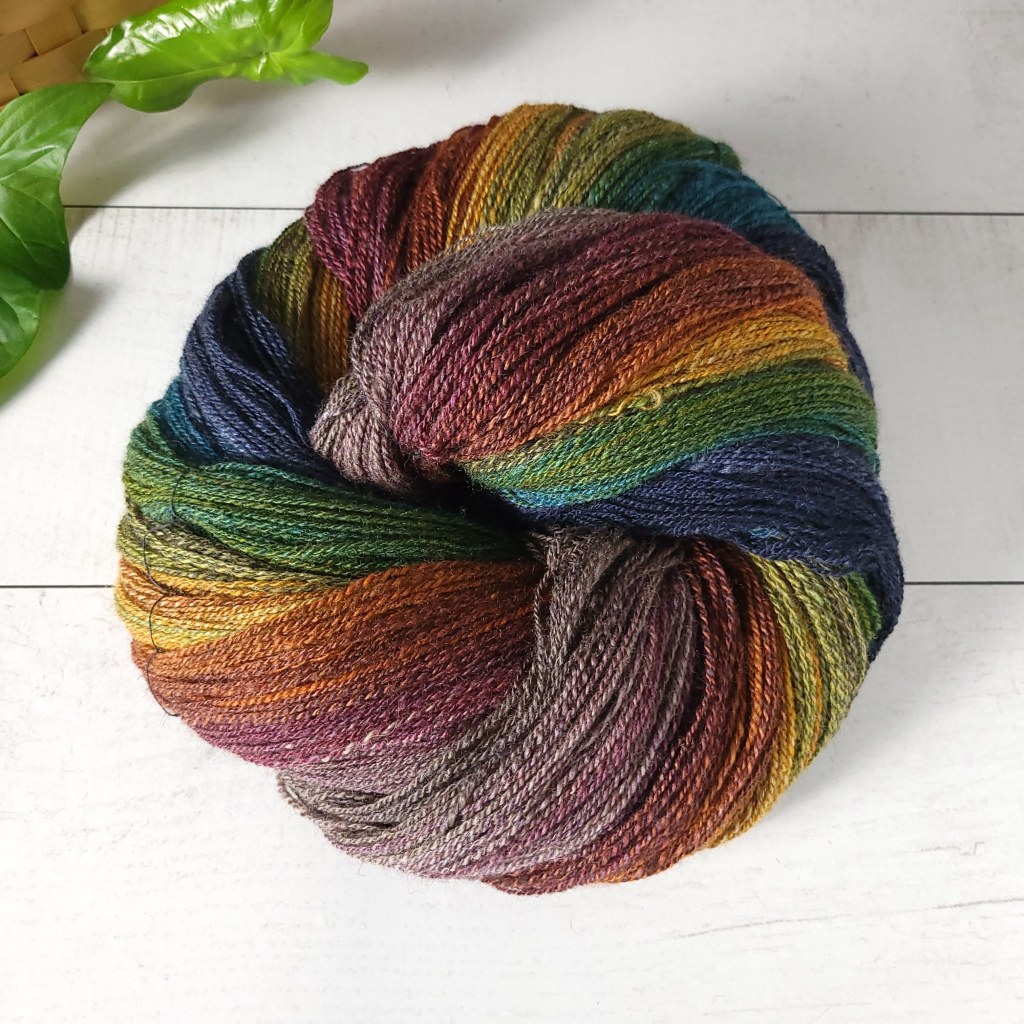
And then I added the skein it to the other piles of yarn gracing the shelves of my house. Remember, my hobby is spinning, not using the yarn!
Overall this was a very enjoyable spin that produced an absolutely gorgeous yarn. The pace was more ambitious than most of my spinning projects, however, and I don’t see myself doing that again any time soon. At least not until Tour de Fleece next year!

Your yarn is gorgeous! Thank you for sharing!
LikeLiked by 1 person