
This is the second article in my new series, “Planning for Painless Plying.” The guides in these articles are primarily intended for new spinners and process spinners. If you missed the first article on planning to spin a mirrored gradient, you can find it here.
Scenario 2: One-Way Gradient
Scenario 2 also focuses on a gradient. With a gradient, the colors progress linearly along the fiber, rather than being dyed randomly or running the entire length of the braid. In this second scenario, the color progresses only in one direction, rather than being mirrored (or reflected) in the center of the braid. The fiber I’m using for this study is Tickled Pink, by Ingelnook Fibers, dyed on a 70/30 silver Hanui/mulberry silk base.

While the fiber was packaged as three balls of fiber, rather than a braid, it still appears to be a combed top preparation when arranged from darkest pink to white to create the gradient. I’ll still use the term “braid” in this post since that is how spinning fiber often is sold.

A lot of the considerations mentioned in the mirrored gradient also apply to this one. Because each article is designed to stand alone, applicable text from the previous article will be repeated here.
Option 1: Chain Ply or Unplied Singles
The gradient is spun continuously from one end to the other: in this example, from dark pink, through pastel pink, to white. Then you either chain ply the single yarn, or leave the singles unplied. This approach preserves the gradient exactly as the dyer created it.

When to Choose Option 1…
- To preserve the color gradient exactly as it was dyed
- You don’t want to weigh or measure your fiber to attempt to spin singles that are the same yardage
- Zero leftover singles (think luxury or sentimental fibers) from one bobbin or spindle having more yarn on it because you never can manage to spin single yarns of the same yardage, no matter how carefully you weighed and measured
- Chain ply: you tend to spin fine, and want a thicker finished yarn
- Chain ply: you want a round, squishy yarn
- Singles: you plan to use the yarn in weaving, or don’t mind the um, personality of fabric knitted with singles
Option 2: Two-Ply—Lengthwise Split
The fiber is carefully split in half along its entire length, and each half is spun as one of the two plies. Weighing the fiber while splitting can help ensure each half will have the same amount of fiber by weight, although the yardage will often still differ between the two because of variances during the spinning process.

When to Choose Option 2…
- To preserve the color gradient, but with more marling and blending of the colors than a chain ply
- You want a two-ply yarn for knitting lace
- You have two bobbins or an even number of spindles
- You don’t mind carefully measuring the two lengthwise pieces as you divide the fiber, knowing full well that the two sections will still end up different yardages
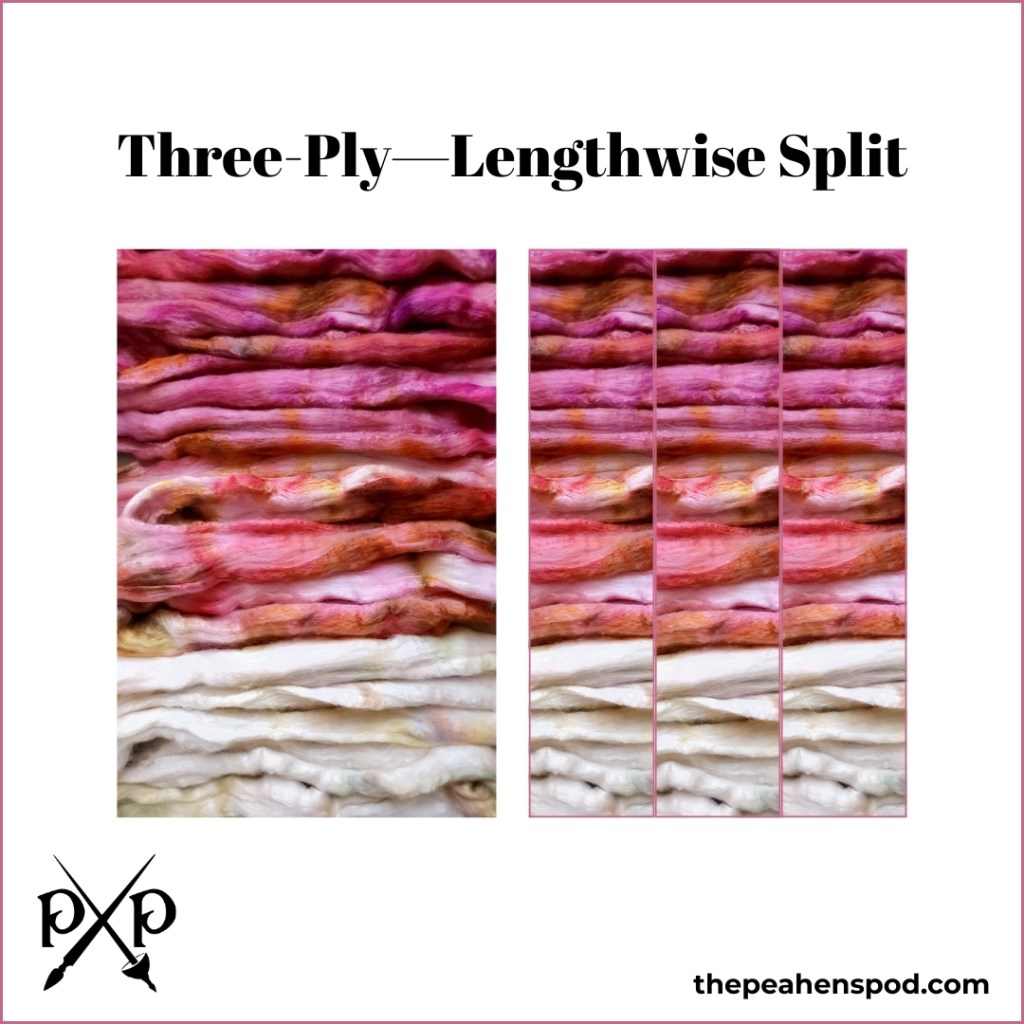
Option 3: Three-Ply—Lengthwise Split
The fiber is carefully split into thirds along its entire length, and each third is spun as one of three plies. Weighing the fiber while splitting can help ensure each third will have the same amount of fiber by weight, although the yardage will often still differ between the three because of variances during the spinning process.
When to Choose Option 3…
- To preserve the color gradient, but with more marling and blending of the colors than a chain-ply
- You want a round, squishy three-ply yarn, but find the process of chain plying unduly tedious or challenging
- You have three bobbins or a number of spindles divisible by three
- You don’t mind carefully measuring the three lengthwise pieces as you divide the fiber, knowing full well that the three sections will still end up different yardages
Option 4: Mirrored Gradient
This is the opposite of Scenario 1, Option 4. There, we took a mirrored gradient—where the colors were reflected at the middle of the fiber—and rearranged it to proceed in one direction. This time, we create a mirrored gradient from the one-way color progression.
This doesn’t count as a “reversed mirror gradient,” as in Scenario 1 Option 5, because the gradient wasn’t mirrored in the first place. Instead, we have two methods for turning this one-way gradient into a mirrored gradient.
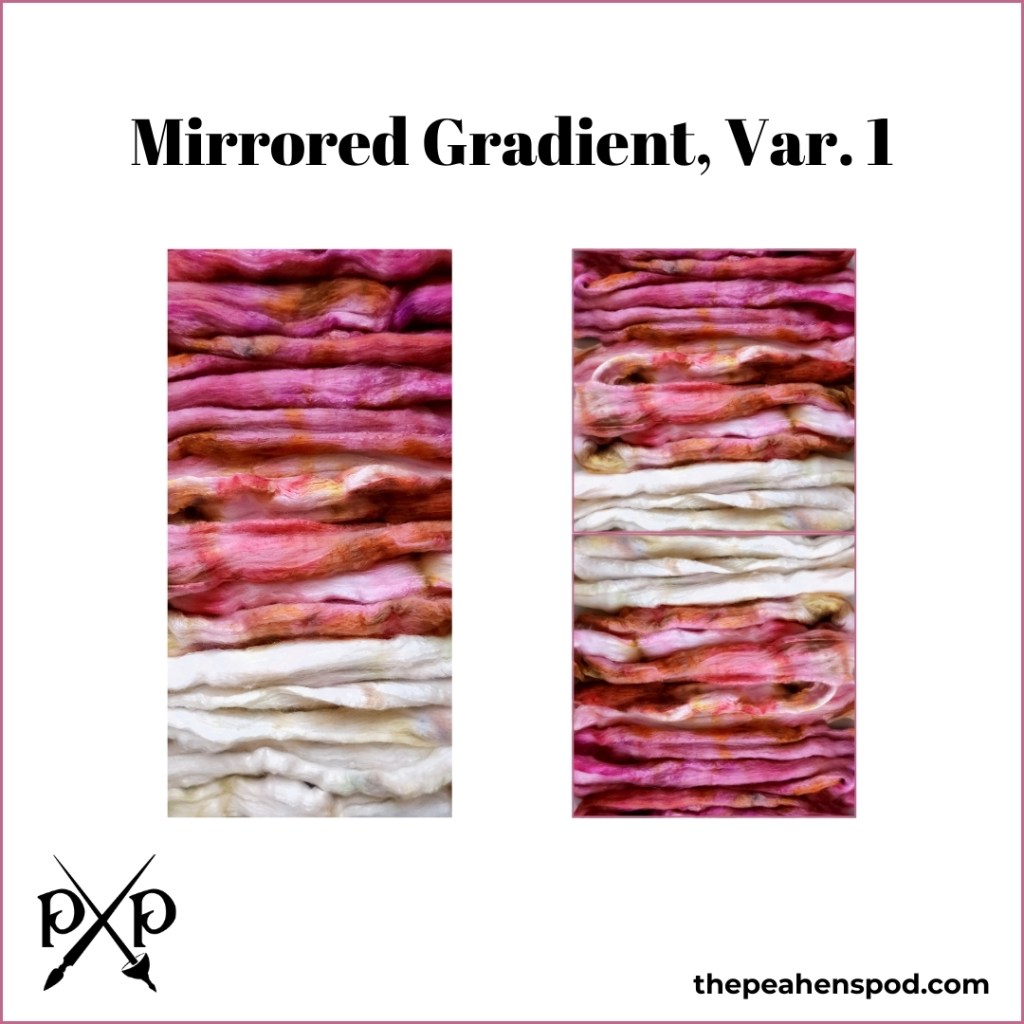
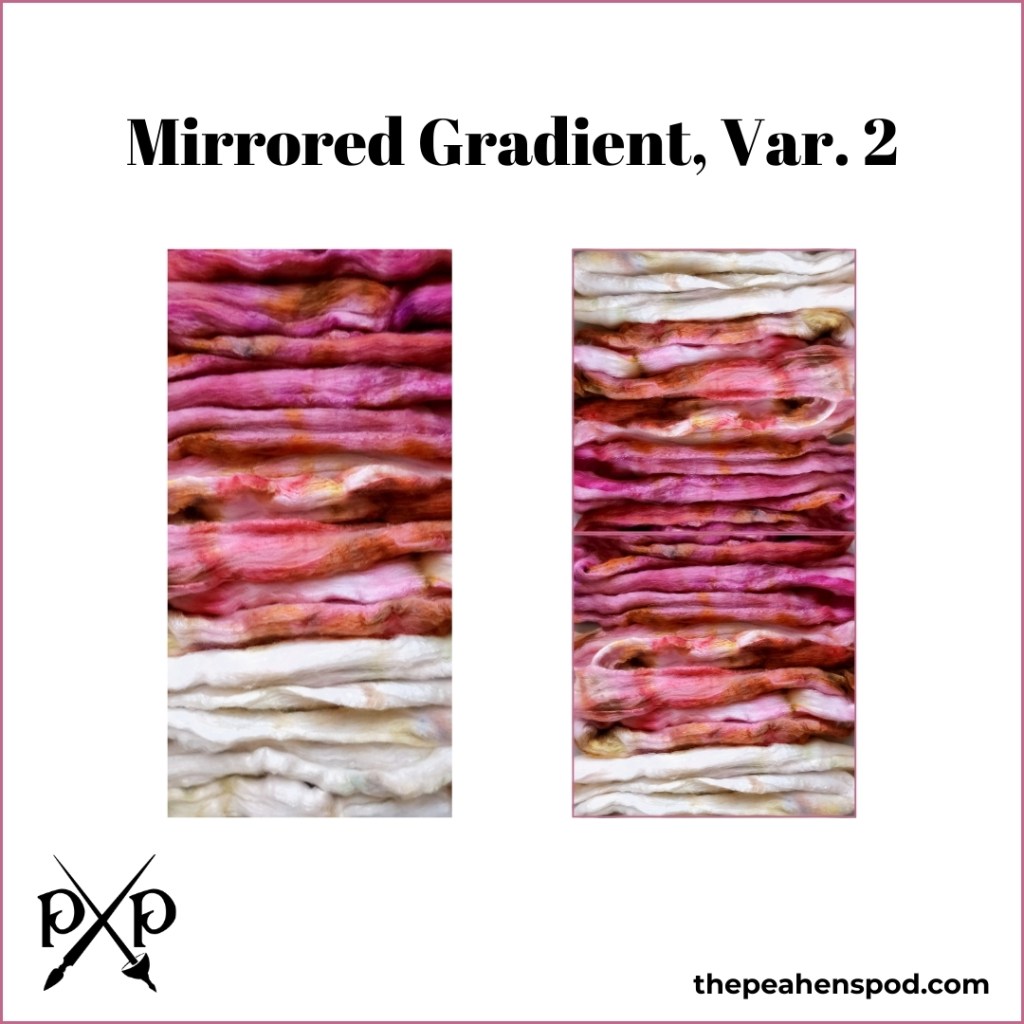
In this approach, the fiber is split into two halves lengthwise. With the variation shown above, the first half is spun from dark pink to white along the gradient, and then the second half is spun white through to dark pink. This would create a gradient reflected around white in the center. You could also flip the colors, progressing from white through dark pink back to white. This variation is shown below.
Either variation of the mirrored gradient option can be be spun with any of the first three methods: chain ply or left as singles (Option 1); two-ply split lengthwise (Option 2); or three-ply split lengthwise (Option 3).
Note: I have heard that if you change the direction in which you spin combed top, the fiber may not draft as smoothly since you’re drafting in the opposite direction from how the mill processed the wool. If you encounter this issue, additional fiber prep (fluffing, steaming, or predrafting) might help.
Option 5: Translated Gradient
For this scenario, the translated gradient is easiest to achieve by splitting the braid in half lengthwise and arranging the two halves, one after the other, with each half starting with the dark pink and ending with white.

The translated gradient option can be be spun with any of the first three methods: chain ply or left as singles (Option 1); two-ply split lengthwise (Option 2); or three-ply split lengthwise (Option 3). However, since the braid was already split in half lengthwise for the color progression to repeat, it may become very tedious to attempt to divide it further.
Option 6: Fractals
In the first post in this series, I intentionally omitted fractals because I thought they were too complicated compared to the other options. However, I received a lot of offline questions about how to visualize a fractal spin. Much has been written about what a fractal spin is (and is not) and I covered some of these topics in this post on planning a fractal spin. In the simplest fractal arrangement, the first ply maintains the original color progression while a second ply repeats the progression twice.
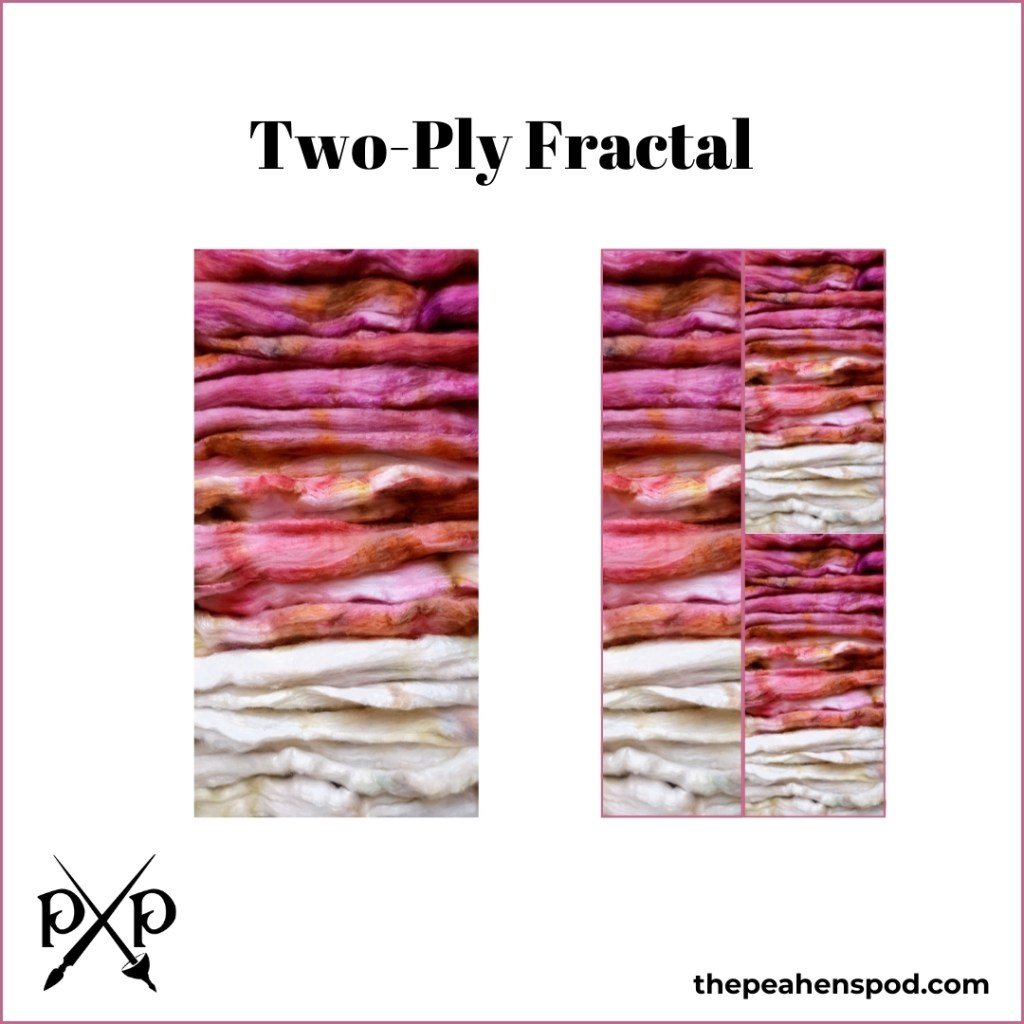
You could add additional plies, with increasingly more frequent color repeats, to produce a yarn with subtle striping in the finished product. Personally, in this example I feel like the yarn would look too much like a candy cane in all the areas where the pink and white were plied together!
Option 7: Flipped
I almost didn’t include this method, because it’s not something I would ever select, at least not with these colors. However—for thoroughness—here is what happens if your fiber offers a one-way gradient and you reverse one of the plies in a two-ply yarn.

With these colors, the resulting two-ply yarn will feature candy cane sections at the beginning and end, with a stripe of the intermediate shade of pink in the center. This effect can be achieved with two different methods.
Option 7, Method 1: Plied from Both Ends
Scenario 1 Option 4 Method 2 described unmirroring the gradient by spinning the braid end to end, then using a center-pull cake (or similar method) to ply both ends together. Using this same method would produce a very different result with Scenario 2, since the gradient is not mirrored in the center.
When to choose this method…
- You don’t want to weigh or measure fiber for singles, you just want to spin!
- Zero leftover singles (think luxury or sentimental fibers) from one bobbin or spindle having more yarn on it because you never can manage to spin single yarns of the same yardage, no matter how carefully you weighed and measured
- You have only one bobbin or an uneven number of spindles.
- You want a two-ply yarn for knitting lace.
- You have a cake winder to create a center-pull cake to ply, and something to keep in the center of the cake so it doesn’t collapse on itself as plying nears the end.
- OR you have a small amount of yarn for a plying bracelet—or a larger amount of yarn and a specially-designed plying tool—and you never lose track of which way you were wrapping the singles and end up with a tangled mess. Or is that only me?
Option 7, Method 2: Two-Ply—Lengthwise Split
The same color effect could also be achieved by splitting the braid in half lengthwise, and flipping one of the halves. All the same pros and cons from Option 2 apply here. Also, see the earlier note about possible challenges when spinning the fiber in the opposite direction from how it was milled.
(This approach—flipping one lengthwise half of the braid—was not mentioned in Scenario 1 because with a mirrored colored gradient, the results would have looked the same as the standard two-ply method.)
The Peahen’s Plan
I picked this fiber for a “Spring Spinalong” I am hosting because the colors remind me of cherry blossoms. I decided to create a mirrored gradient, Option 4 above, to represent pink around the outside of the petals fading to white at the center of the flower. The marling between the separate plies would give the yarn a soft, muted color progression and the three-ply option would create a thicker yarn than what I normally make.

Since the fiber arrived as three separate colors, I thought it would be relatively easy to prepare. Unfortunately, I quickly realized that splitting fiber lengthwise into sixths was a nightmare. Even with a scale and tedious weighing, there was no good way to make sure that each strip was the same amount of fiber as the others. (And as mentioned above for Option 3, even if each singles is the same weight, odds are they will still be different lengths when you sit down to ply!)
I finally resorted to deconstructing each color into six chunks to reassemble into the necessary order for spinning and eventually plying.

But this is a post on planning, not actual fiber prep. I will post more gory fiber prep details in a future update.

[…] In my last post, I promised more details about how I organized the Tickled Pink spin. I usually opt for spinning projects that require the least possible degree of thought and organization. As a result, Tickled Pink has been quite the learning experience. […]
LikeLike
[…] months later, I finally finished my Spring Spinalong project, Tickled Pink by Inglenook Fibers. This post discusses how the spin went, both in terms of […]
LikeLike
[…] fiber in my stash tends to be gradient-dyed, with colors marching along in progression from one end to the other or mirrored about the middle. These rolags, by contrast, might be best described as having a […]
LikeLike