
I know it’s been quiet here. For 2024, I gave myself permission to suck at blogging while I’m drowning in other projects. The biggest of these is the launch of Cedar Springs Fiber Arts Center later this year (hopefully not too much later).
But I also decided to do the 100 Hundred Day Project, which ran this year from February 18, 2024 to May 27, 2024. The idea is simple: work on an art project every single day for 100 days. Easy, right? How little did I know!
For a project meaty enough for 100 days, I chose to interpret one of my daughter’s art pieces in a tapestry which was woven primarily from my supported spinning. My previous tapestry experience (all four self-taught months of it) had been free form, textured and chaotic, so this would provide a fresh, new challenge.

Pro tip: if you ever try the 100 Day Project, don’t pick a brand new hobby or artistic expression. Otherwise, 100 days drag on forever.
Using someone else’s art (with permission, of course) allowed me to skip the design and composition and jump straight to weaving. Er, spinning then weaving. Well, if we’re being technical, I blended custom colors, spun them, wove with them, decided I hated the colors and started all over again.
Thankfully, I had 100 days to get it right. Or close enough, anyway!
Rather than bore you with a chronological blow-by-blow of my 100 day project, I’ve organized this post by topic. For each topic, I’ll delve into things I thought went well, what I learned, and opportunities to improve in the future.

Tapestry Design
First and foremost, starting with my daughter’s art did not, in fact, automatically solve all design decisions. By the end of the project, I had learned two valuable lessons.
- The vertical lines of the trees may have looked better if I had woven the entire piece sideways.
- Weaving on a larger loom with a larger design area would have been easier—especially for someone new to the art—instead of trying to cram that much detail into a 5″ x 5″ space.
Blending Fiber
Like I said earlier, I custom-blended most of the colors for this tapestry. However, that wasn’t the original plan. I meant to use a mix of existing hand spun and commercial wool yarn, but I was unhappy with the color palette. So I made my own! I repurposed dyed combed top braids—primarily wool—from my stash. I used my blending board to create rolags to spin supported.
My main takeaway is that I suck at blending colors and I need WAY more practice.
- I need to choose colors more carefully. The values are too similar in many areas, for instance making the green trees indistinct from the sky.
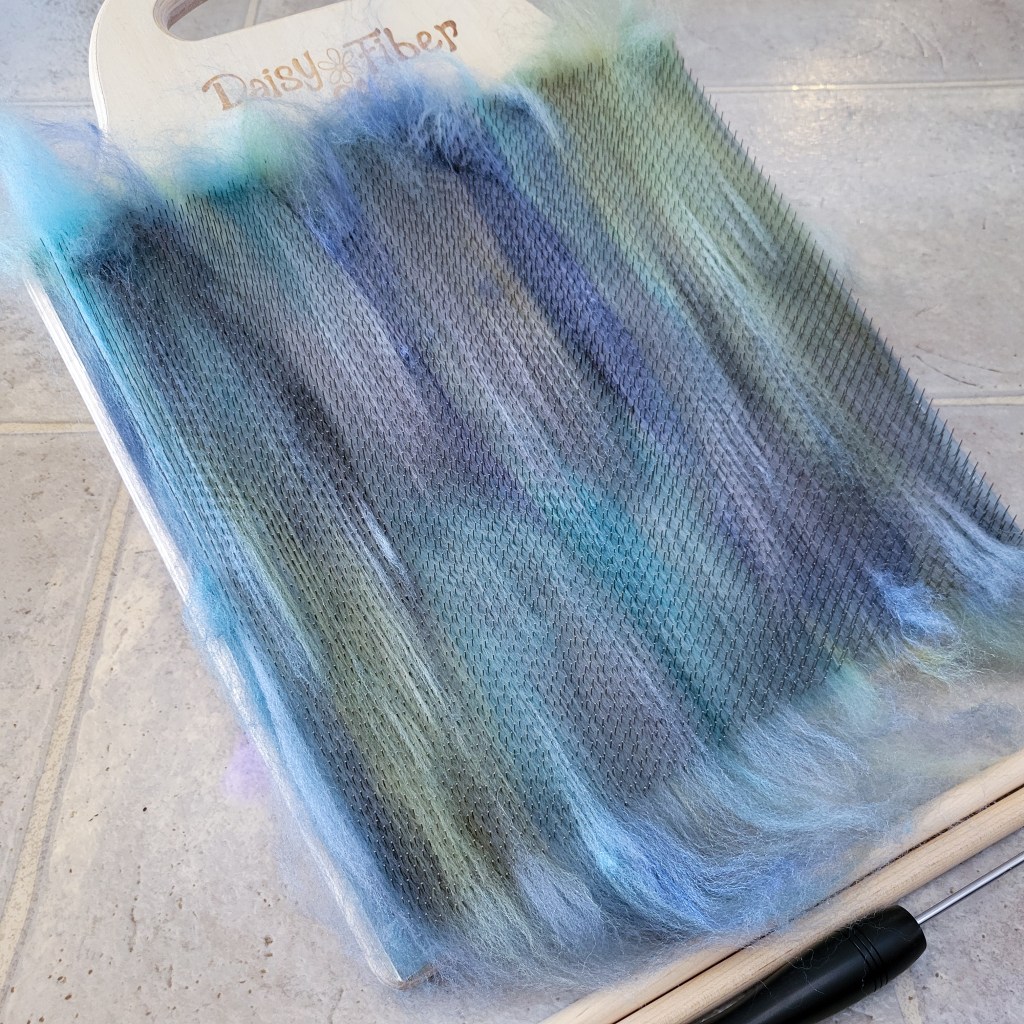
- In other cases, the values were too different. I wanted the lake’s blues to blend gradually from lighter to darker blue. Unfortunately, the original two blues had so much contrast, where they met formed a jagged line instead of a smooth transition. You can see this result on the middle right section of the photo below.

- I had to blend a third blue halfway between the previous two to achieve the gradual color change I wanted. Next time, I’ll photograph the candidate fibers in black and white to help identify where the values are too similar (or not similar enough), prior to spinning and weaving with them.
- I also realized during this project I may be “temperature blind”, because I struggle to discern if a color has warm or cool undertones. Mixing dyed fibers with different undertones can create muddy results when blending. The Spring 2024 issue of Spin Off Magazine had a great article about this very subject… which I did not receive in the mail until I was already well into this project!
- I thought hand-blended, hand spun singles would produce a speckled, textured effect on the beach and trees. I was horribly wrong. I had to improvise to prevent the landscape from looking flat. For the sand, I used a supplemental weft for a periodic pop of color. (It’s hard to tell if they were rocks or plants in the original artwork.) For the trees and shrubs, I embroidered a contrasting singles yarn randomly over the area to evoke leaves. I originally tried needle felting to add shading on the trees. But tapestry weaving is very structured, and needle felting is so amorphous, the two techniques really clashed in this tapestry.
- While most of my blending choices were based on color, I sometimes varied the kinds of fiber to produce different results. For instance, I added a lot of alpaca in the sand for a matte effect, and Teeswater longwool for the lake blues to make it look lustrous. Unfortunately, I can’t tell the difference in the final product.
- The one fiber choice which made the most difference wasn’t blended at all. I used unspun white mohair locks for the foam on the waves. Earlier experiments with wool roving, white singles, and even embroidered white silk all failed to capture the shimmer of sunlight on waves that the mohair effortlessly conveys.
Spinning for Tapestry
Normally I spin 4 oz combed top braids which takes months. Then I let the singles rest, which is code for, “I hate plying so I put it off as long as possible.” Eventually—sometimes years later—I finish the yarn, which then sits on a shelf for the remainder of its earthly days.
Spinning singles for tapestry weaving changed everything for me.
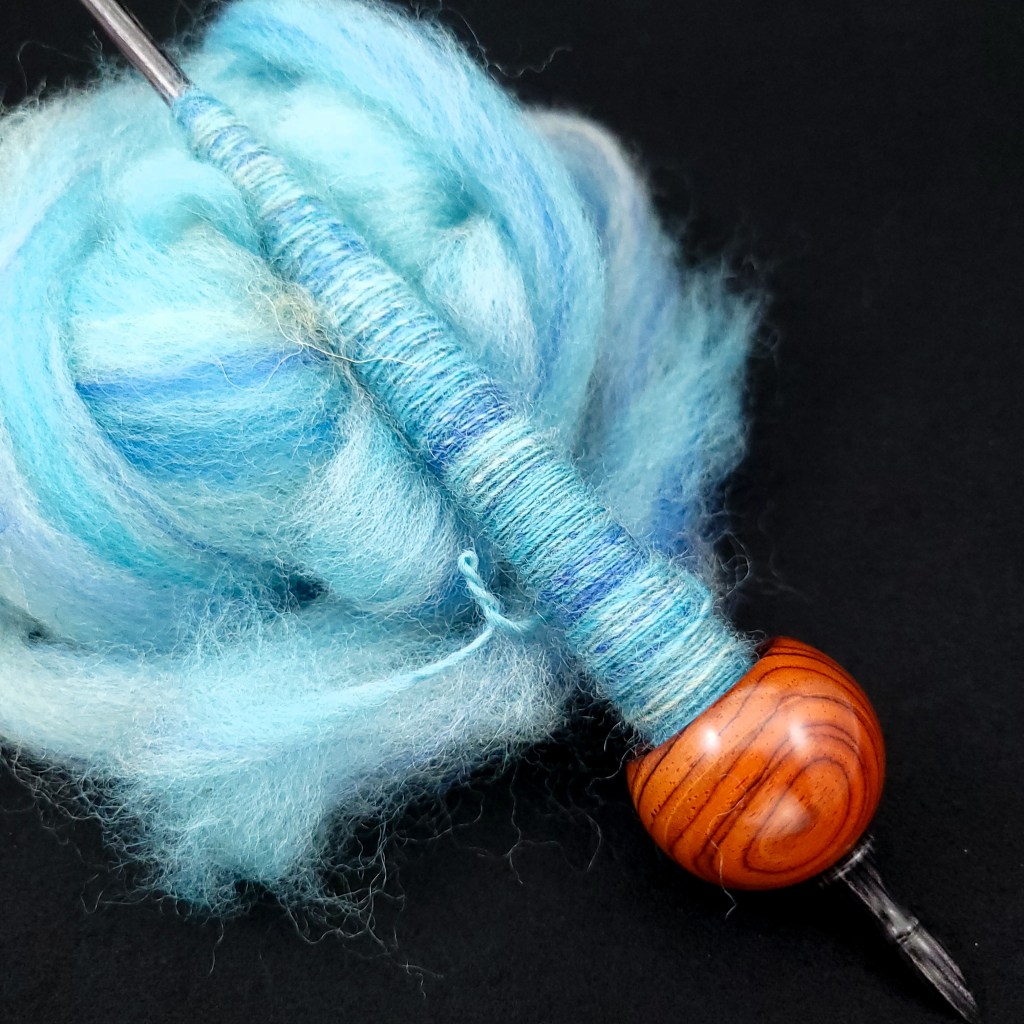
- I enjoyed spinning singles for weaving, because I could quickly spin up a few grams of a particular color and finish the singles the same day. By the next day, they were dry and ready to weave! No spinning for days to finish a braid. No plying.
- But a singles yarn will kink up unless you keep it under tension while drying.

- I didn’t know this originally, so the earliest singles twisted up on themselves or anything else they could reach. I learned from a friend that hanging weight from the drying yarn helps subdue the extra twist. Unfortunately, the weight never eliminated it completely.
- The weaving tension helps tame the singles’ energy, but you can see how the urge to twist lingers in the fringe. I might treat future hand-spun singles fringe with sizing of xanthan gum or gelatin to tame the twist.
- I spun my yarns at several different weights. For example, the sky was a large, fluffy singles yarn. The lake yarns were relatively fine. The green trees were finer spun than the red trees. If I could do it over again, I would spin thicker yarns for foreground or closeup objects, and finer yarns for more distant objects.
- I even managed to spin my own art yarn on a supported spindle by blending short-stapled Gulf Coast Native wool locks with longer wool and leaving the locks slubby while spinning. Which is how I learned that thicker yarns, or yarns with slubs, form lumps when you reverse direction with your weft.

- I spun more yarn than actually needed because I did not know how to estimate the yardage required for a small project like this. Unfortunately, I kept lousy records so I have only an approximate figure for how much yarn I used, which I calculated using this scary thing called math.
- The original white fringe was mostly commercial spun yarn from my local fabric and crafts chain store. Thankfully, once I finished the weaving I still had plenty of singles left over to swap out one layer of the white with fringe that matched the bottom row of the tapestry.
Tapestry Versus Other Fiber Hobbies
I quickly learned I screw up as often with weaving as knitting.
Most of my mistakes took the form of weaving in the wrong shed when changing colors or adding new weft yarns. Other mistakes included the aforementioned poor color choices. Weaving differed from knitting, however, in how fast I noticed the mistakes. This meant I fixed them sooner than I ever manage when knitting. As a result, I enjoyed the process of tapestry weaving more than knitting, even though both are equally slow and tedious for me.
Overall Tapestry Weaving Process
- I prefer to weave with butterflies rather than shuttles or needles. This is especially true with areas with lots of “meet and separate” wefts from different colored yarns. Butterflies also lack rigid structure, which made them easier to force through the warps when I started running out of room. I didn’t try weaving with bobbins because of the small size of my frame loom.

- Tapestry is a great way to use small bits of yarn—assuming the colors work, of course—because even a short length can add a dot or line as accent. Pieces of yarn that are too short for knitting can find a new life in tapestry weaving.
- I chose not to sew up the slits left by solid lines of color sections. Because of how I interlocked colors with the trees, the slits were few and unnoticeable.
- Next time I make a tapestry which takes this long, I will add the fringe after the weaving, rather than at the beginning. Otherwise, it just gets in the way. I’ll leave room at the bottom with waste yarn or card stock, and then insert the fringe when the body of the weaving is done. Or maybe I will skip the fringe altogether. …nah…
Participating in the 100 Day Project
While I’m glad I tried the 100 Day Project, I don’t think I will do it again next year.
- My attention span for fiber projects does not last for 100 days.
- Additionally, I failed to complete the project within 100 days. At day 101, I took a much needed break for a few days, then finally circled back to the weaving. By day 113, I had finished the ends, replaced the fringe with hand spun, steamed and blocked the piece, and lashed it to its wooden hanger. Whew. At least I could say it was finally complete, and not too far past the finish line.
One final note: I wove the tapestry on a prototype Spanish Peacock frame loom. An updated version of the loom is currently in beta release, and will be available for regular purchase in the near future.

Wow! I am impressed! I tried the 100 day also and failed miserably. It just wasn’t the right time for me. Your weaving is wonderful and an awesome tribute to your daughter’s artwork!
LikeLike
That tapestry is really lovely — it’s a beautiful interpretation of the original painting!
LikeLike
I am amazed at how beautiful both the painting and the weaving look. And all the yarn on the spindles. Very inspirational.
LikeLike
[…] practicing eSpinner spinning with leftovers of a braid I’d pillaged for the green trees in my 100 Day Project. With no plan, chain-plying let me finish without overthinking […]
LikeLike