
Here are the results of my sampling for the upcoming Spintentional Spinalong. Please remember this is my very first time spinning samples prior to just diving into a project. Don’t laugh too hard!
Sample 1. Two-ply yarn, spun on one spindle and plied from a center-pull ball
Believe it or not, I’ve never plied using a center-pull ball before. I never felt confident in how I wrapped the yarn around my nostepinne, and worried the ball would lose its shape as the yarn was consumed by plying. Luckily for this small amount of yarn, I also have a mini-nostepinne whose diminutive size made it perfect for this task.
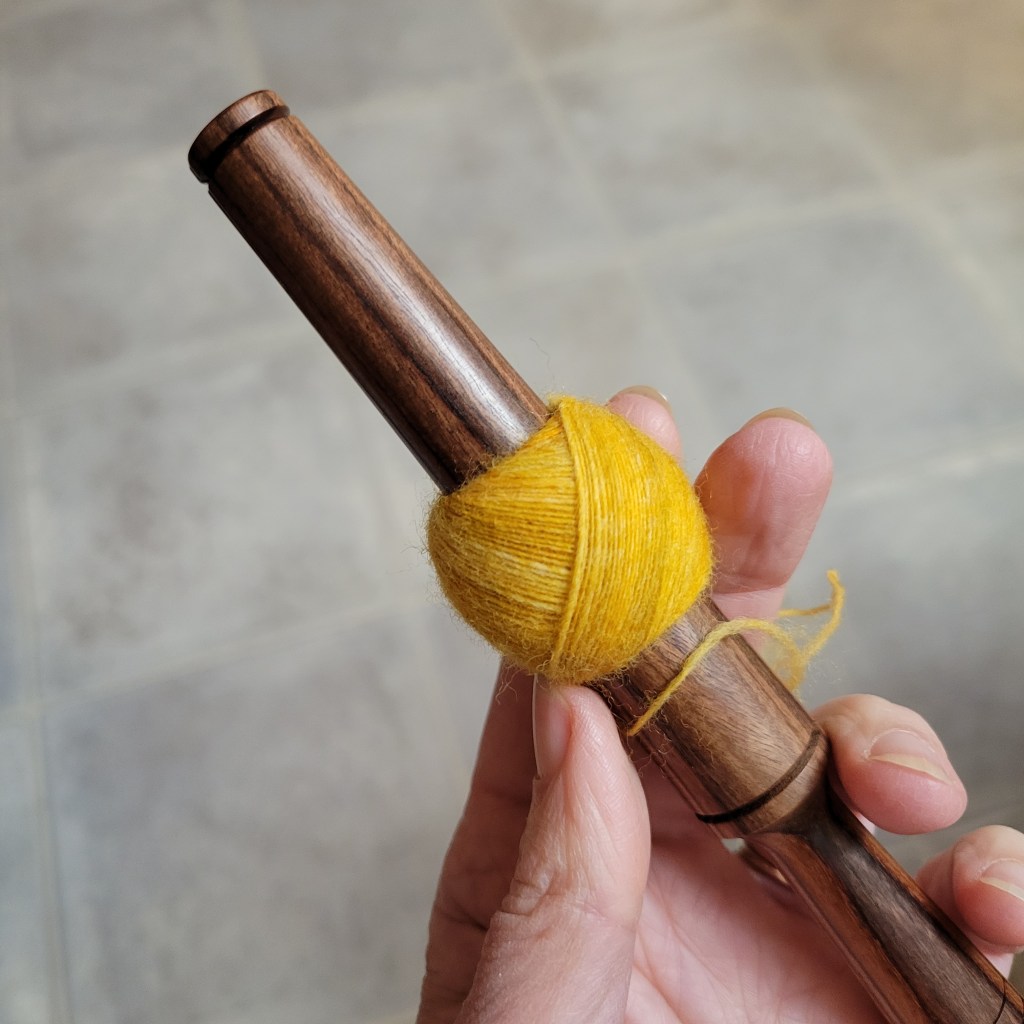
I kept the ball near the end of the nostepinne while plying, which kept the ball from collapsing in on itself as more and more yarn got pulled out of the ball to form the singles.
The two-ply “should” be the best choice for a lace design, but I liked the look of this one the least.
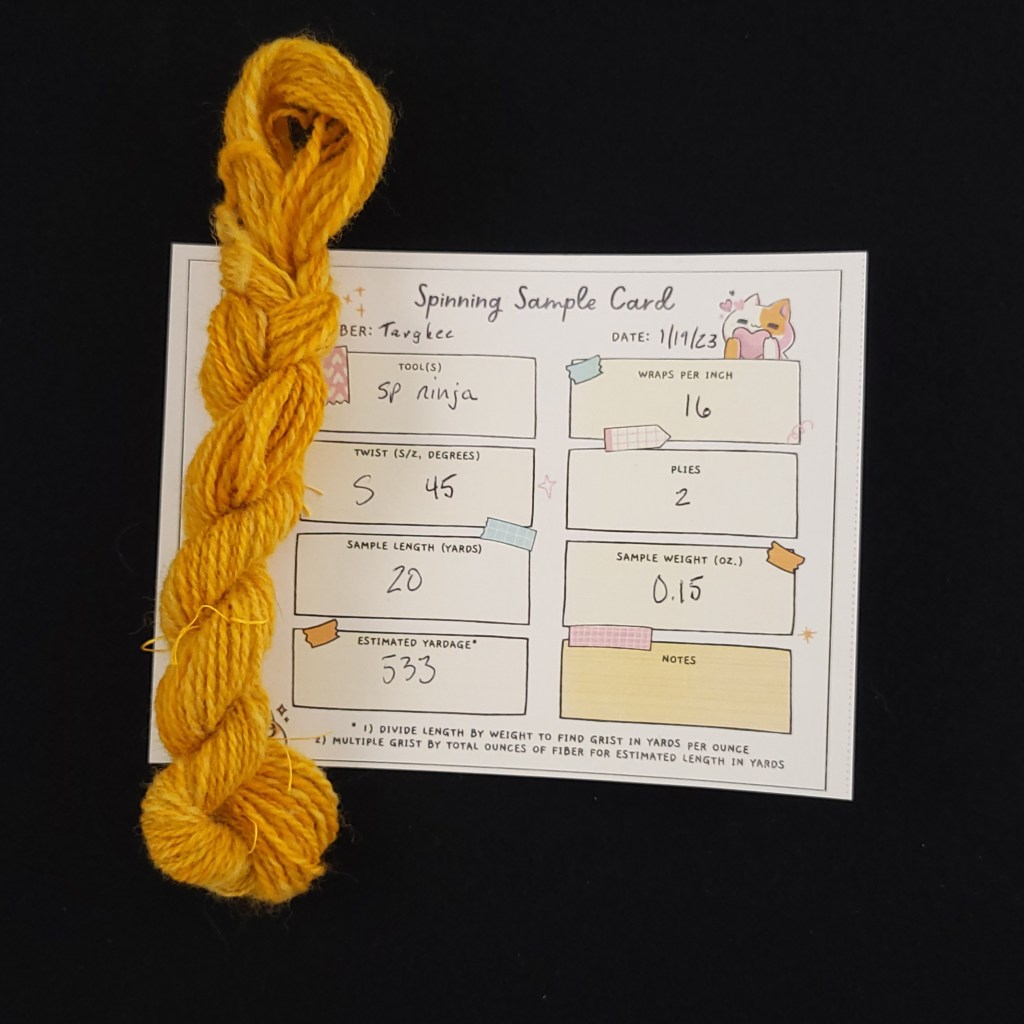
Ironically, I also put the most effort into this one, constantly checking with my control card to verify the weight of singles I was producing. But you can see in the photo that the yarn was not terribly consistent.
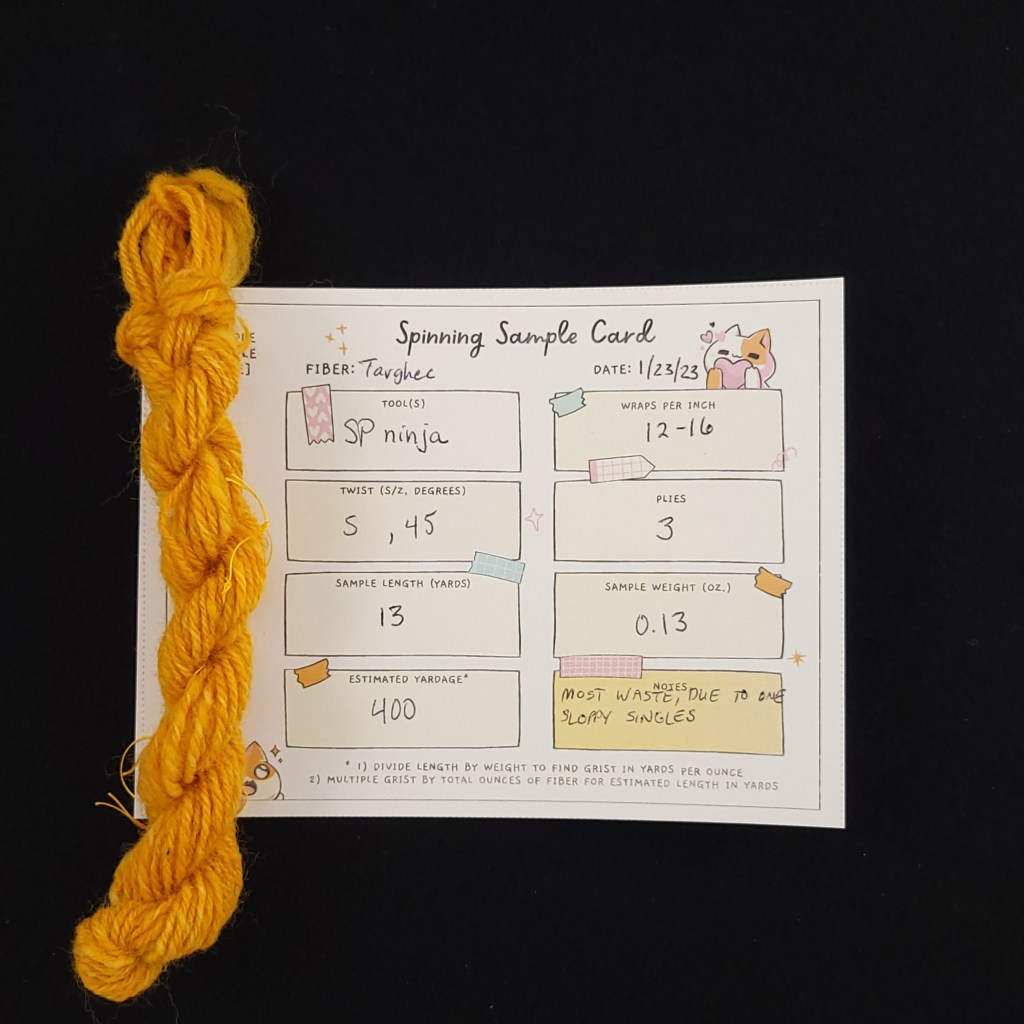
Sample 2. Three-ply, spun on one spindle, and chain-plied
For my second sample, I defaulted to my usual approach: the chain-plied yarn.
Only this time, instead of creating the chains while plying, I wound a plying ball first. This was not easy to do with a tiny little sample, but I persevered. Forming a chain-plying ball first allows the singles to be more smoothly laid out prior to adding the twist. I don’t know if I could explain how to chain while wrapping a ball, but luckily I don’t need to. You can read all about it here!

To my surprise, this yarn was not one-third shorter than the two-ply. Turns out I spun the singles thinner in the first place, because I knew it would be three times as thick once plied, rather than only being twice as thick. I also failed to check the singles gauge at any point, but the yarn ended up (relatively) consistent. I suspect I hit that default groove I was hoping to find with my fleet of coordinated ninjas.
The other thing I learned is that measuring yarn samples is as much art as science. Both Sample 1 and Sample 2 appear to be 16 wraps per inch, and they weigh the same. They ought to have the same yardage. But they don’t. Maybe one is actually 15 w.p.i., and the other is 17, but the w.pi. is inconsistent anyway because they are hand spun. Or maybe my scale lacks the accuracy I’m looking for when dealing with these tiny samples.
Sample 3. Three-ply, spun on and plied from three separate spindles
I thought this would be a shoe-in for my favorite, but it resulted in the largest waste of yarn. Despite my care in splitting the tiny chunk of fiber…
…despite picking spindles that were similar so the physics would be similar resulting in singles that were similar…
…one of the spindles ended up with much less yardage than the other two.

FNG!
So much for finding a “groove” and skipping the gauge check! In addition, you can clearly see that one of the two remaining spindles still has way more yardage available than the last.
Unfortunately, this predicament closely mirrors the reality awaiting me at the end of spin, once I’m ready to ply.
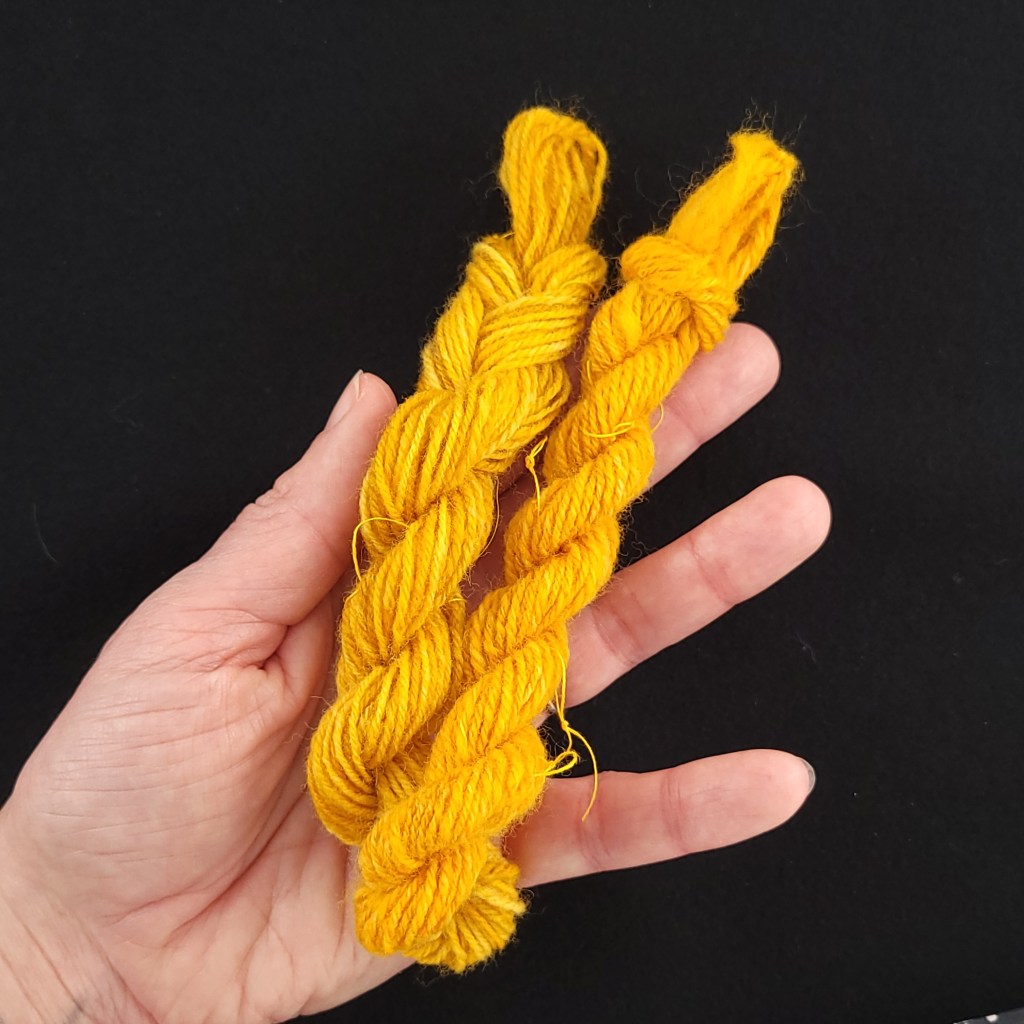
If I ply singles from two or three separate spindles, somebody is going to end up with slightly more or slightly less yarn, resulting in less yardage for the cowl. No matter how carefully I check my gauge (and we’ve just seen I’m terrible at checking), it will never be perfect. If one singles yarn ended up significantly longer than the others, I guess I could always use either the center pull skein (two-ply) or chain-ply (three-ply) to use up the last bit of yarn. But as we’ve seen from the samples, that last bit will be very different from the rest of the yarn.
Luckily I have some time, plenty of yellow fiber, and a powerful desire to try this particular sample again.
Final Thoughts on my Spintentional Spinalong Samples
Since my planned project for the yarn is “just” a cowl, the gauge for any of these samples should be close enough to produce a workable garment.
Likewise, I think any of the three samples will provide sufficient yardage for the project. Never mind the fact that a cowl is relatively easy to lengthen or shorten depending on how much yarn you have!
I probably will opt for one of the three-ply yarns, but haven’t decided which. The chain-ply doesn’t have the marling effect of the “regular” three-ply, and it would neatly avoid the problem of spindles having different yardages. Plus, the lace design might be even harder to notice with the colors all swirled together. It will already be somewhat muted by the choice of a three-ply approach.
Last but not least, the second braid recently arrived and I like its blend of colors even better than the original I had been sampling from.

Let the spinalong begin!
… in a week …
Sigh. Guess I’m off to redo that last sample.
AFFILIATE DISCLAIMER: I am very affiliated with the Spanish Peacock, which you probably already knew if you follow this blog. All fiber tools I used in this blog post – mini nostepinne, plying stand, and spindles – are Spanish Peacock products, as are the fiber tools I failed to use – namely, my spinner control card. If you are interested in beautiful fiber arts tools, you can visit the Spanish Peacock website to what inventory is currently stock. (Just to be clear, I do not earn a commission if you make a purchase using this link.)

[…] As I promised in my last post, I took the time to re-make the third sample for my upcoming spinlaong. This third sample was a three-ply yarn from three separate spindles, rather than my default chain-ply. […]
LikeLike